
Hey Guys!
Why does no one talk about himmeli anymore? It’s such a beautiful art form and the actual himmeli art is fascinating! It’s geometric and easy to replicate the intricate designs with trendy brass tubing. But as trends come and go in home decor and design, himmeli has fallen by the way side. But I have not forgotten and am still obsessing!
Because explaining this kind of technique can be really difficult to explain in written word, I filmed myself creating the light fixture in case that might help any of you interested in giving it a go yourself!
I’ve seen himmeli pieces made with straws, but I knew that it could be a potential hazard being connected to something electrical. I know most bulbs won’t get hot enough to melt a straw, but I would rather be safe than sorry. So I bought round brass tubes from Amazon. And steel wire from the dollar store. Armed with my supplies, I asked my dad what he thought would be the best way to cut the tubes. He lent me a hacksaw, which worked out pretty good! Looking back, he thinks a dremmel tool would’ve been easier (and props to my Dad for gifting me one for my birthday last year!) Or a tiny pipe cutter.
The process isn’t complicated, but I do think the video helps give life to the instructions.
The Process
Run steel wire through three 6 inch long pieces of tube. Run the wire back through the first rod to create a triangle. Then run 2 more pieces of tube to create a second triangle. Repeat until you’ve got 6 triangles connected that form a hexagon. Then run two pieces of tube that connect to each side of the hexagon, creating 6 more triangles, using the 6 sides of the hexagon as a side for each of the triangles. Connect the points of each of those 6 triangles with a 6 inch piece of tube. For the top, create a trapezoid with 2 pieces of 5 inch tube and 1 piece of 1 inch tube. Connect the trapezoids and you’ll have a small hexagon in the center to run your light fixture piece through.
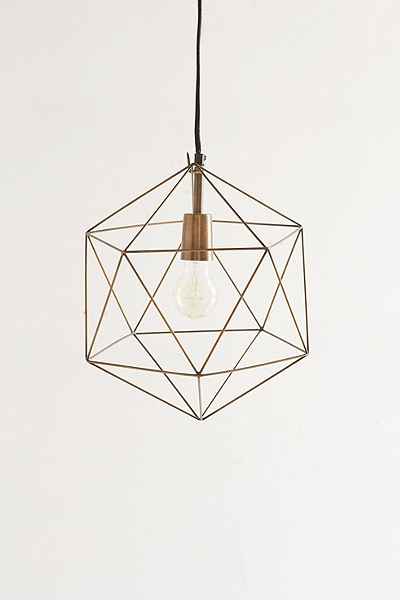
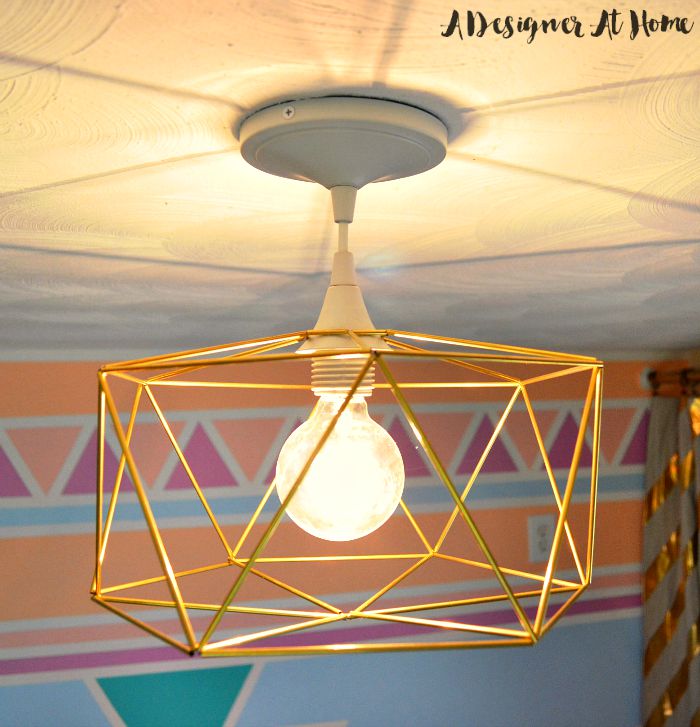
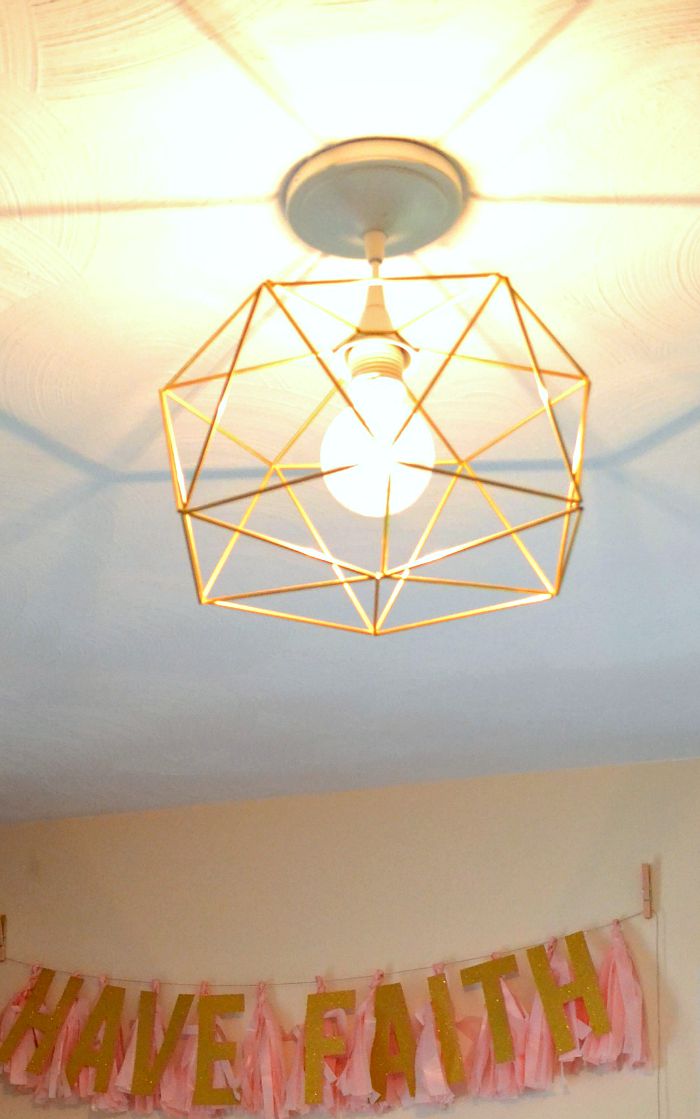
When I had started stringing the brass tubes onto the steel wire, it hit me how delicate and glamorous the skinny brass tubes were. That’s why I changed my initial design up a bit to create a hexagonal drum shaped fixture instead of the more geometric and organic shape of the Urban Outfitters light fixture.
The hardest part for me was working up the courage to hard wire the fixture. Like, it took 2 months to convince myself to just to it already. I had to teach myself how to, without any experience with electrical. It turned out to be SO easy though (but I’m not an electeicial, so don’t listen to me!).
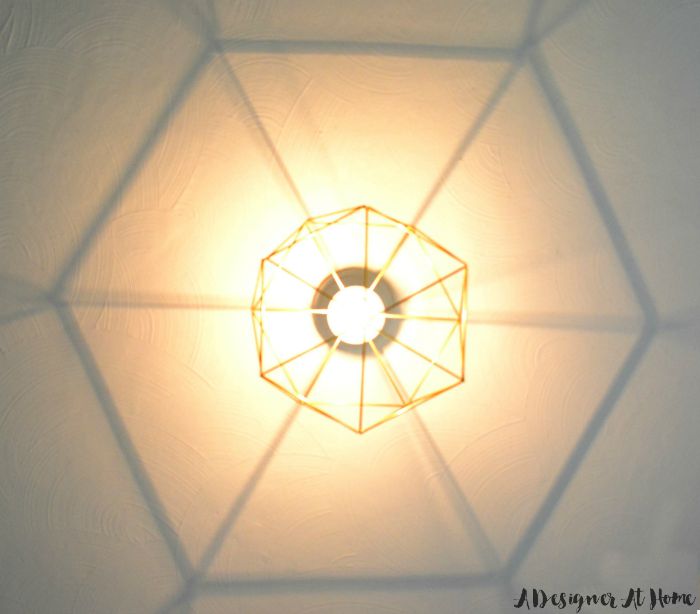
Isn’t the shadow against the ceiling just too cool? I found the globular bulb at the dollar store.
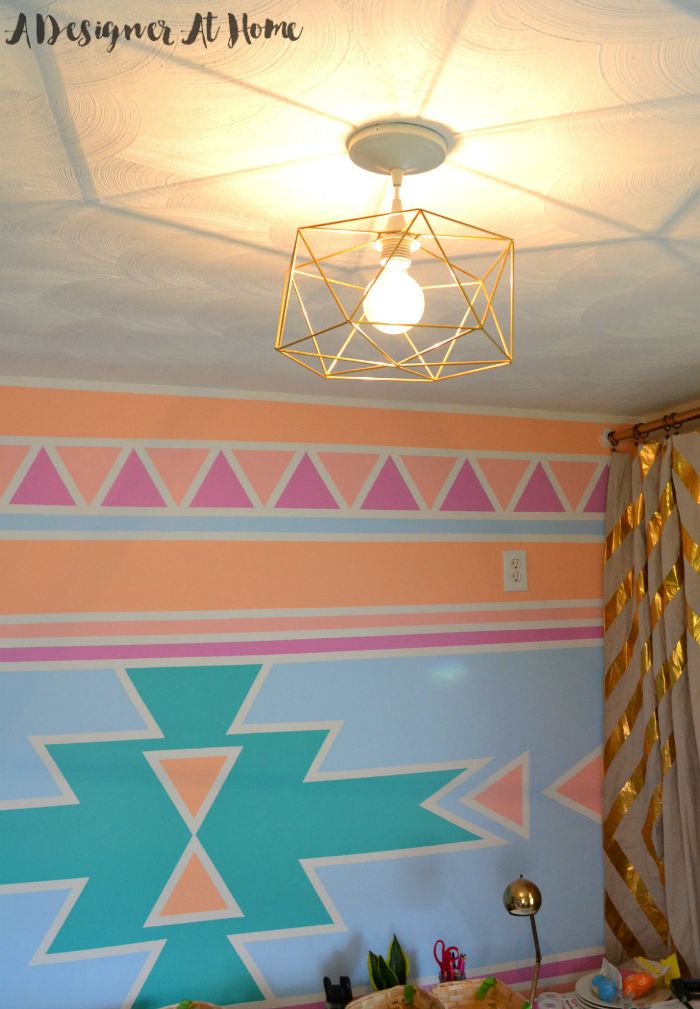
And that’s how I made my brassy himmeli inspired geo ceiling light. Works great as a ceiling light but would also be ultra fabulous as a pendant anywhere.
Love Himmeli? Here’s More Himmeli-like lighting:
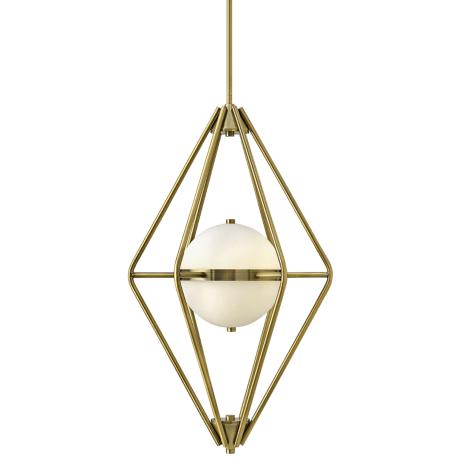
I especially love himmeli when it’s in the form of this fabulous lamp from Lampsplus. With retro flair coming from the frosted glass sphere in the center and trendy geometric lines inspired by classic himmeli techniques, this lamp screams, “hang me somewhere!”
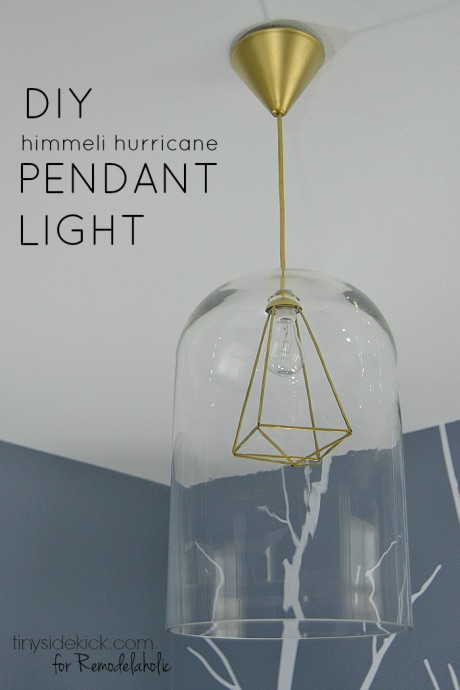
If you’re not keen on a whole lot of geometric factor in your decor, a small dose like in this himmeli hurricane light fixture from Corey of Tiny Sidekick for Remodelaholic is a fun way to add that little touch of whimsy.
The light that inspired my own himmeli adventure is the Urban Outfitters Magical Thinking Geo lamp– I ended up changing the design from the original inspiration, but this is a perfect example of a simplified and airy himmeli inspired light fixture- perfect for anywhere!
I hope there are still people out there enjoying this art form and that you’ve found this post helpful and interesting! Please give it a share and leave me a comment and check out these other posts before you go:
 |
 |
 |
